From The CRPG Addict
 |
| I have a feeling we’re going to regret this. |
The foundation of Britannia was shaken with the rising of an island. This event was no random disaster, it was one of sorcerous intent . . . I felt a great disturbance in the ether when this island arose from the sea. The island is none other than the Isle of Fire where thou defeated the Hellspawn Exodus . . . Avatar, thou shouldst know that when I created the shrines of the Virtues, I also set upon this island three great shrines, dedicated to the Principles of Truth, Love, and Courage. They reside within the walls of the Castle of Fire. I never revealed this to thee before as I thought them forever lost when the Isle of Fire mysteriously sank beneath the waves. The shrines are meant for the use of an Avatar only, and therefore a talisman will be necessary to use one. The talismans are guarded by tests that thou shouldst have no problem passing if thou wishest to seek their counsel.
 |
| The healing potions are nice, but why did Lord British have so much hooch stashed on his ship? |
 |
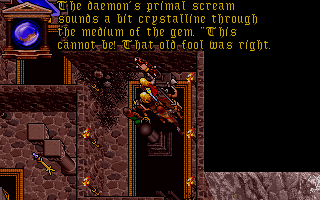
| Looks a bit different from when we last visited. |
 |
| Canon in the making. |
 |
| Yeah, when I need them to save the world. |
 |
| Guys, did that seem a little too easy to anyone else? |
 |
| I don’t know. Was he a confederate general? |
We find the golems, one of them dead and broken in a circle of stones, the other standing mournfully over him. The intact golem, introducing himself as Bollux, pleas for help. He explains that a wall fell on his brother, Adjhar, destroying him. He hands us one of Astelleron’s books, which explains how the Stone of Castambre can be used to animate golems and other inanimate objects. It outlines a process:
1. Find the Stone of Castambre, which should be located in the center of a group of five boulders, with a tree growing out of it.
2. Place something (it was smudged) within the chest of the creature
3. Use a pick-axe to strike the tree and fill a bucket with the tree’s blood.
4. Set down five rocks in a pentagram shape around the creature. Anoint each with blood from the bucket.
5. Cast VAS FLAM UUS on each puddle of blood while chanting some sacred words. Fortunately, VAAS FLAM UUS is contained within the book.
We grab a bucket at Astelleron’s old well. A mountain pass leads into an old mine, where we find a pick-axe. At the end of the pass, a teleporter brings us to a separate valley, where we find the Stone of Castambre and the tree growing out of it. Then next step takes a while because I’m first convinced I have to get up to the level of the tree, so I waste a lot of time trying to stack powder barrels to make stairs (this works with regular barrels but not powder barrels). I then equip the pick-axe and try attacking the tree in combat instead of double-clicking on it to use it. Finally, I figure it out and get my bucket of blood.
 |
| The deer was tempting, as I was low on food, but I figure you don’t kill helpless forest creatures during the Test of Love. |
I still don’t know exactly what to place in the golem’s chest, so I start the ritual without it, pouring blood on each of the five stones that someone (Bollux?) has prophetically placed around the body. I then cast VAAS FLAM US. As I do so, Iolo remarks that we’ll need a heart, and Bollux immediately volunteers his own, digging it out of his chest and collapsing to the ground.
 |
| Technically, this qualifies more as “sacrifice.” |
We place the heart in the body and finish the incantation, which causes Adjhar to awaken. Adjhar, created second, is the more articulate of the two golems. Seeing Bollux’s body, he demands to know what has happened. When we tell him, he asks for our assistance in restoring Bollux to life. At first, I’m worried I’m going to be stuck swapping hearts and collecting blood for eternity (Iolo even makes a joke about this), but it turns out we can fashion a new one with a chunk from the tree.
 |
| Too soon, Iolo. |
Back we go to carve the heart and collect the blood. (The tree is looking a bit sickly by this point.) We repeat the ritual, and soon both golem brothers are standing before us. Adjhar happily gives us the Talisman of Love, as we have demonstrated an understanding of the principle. That raises a question: Was Adjhar really injured in a fall? Or was all of this just a test? If the former, what did the original test look like?
The Keeper of Love bestows 30 dexterity and combat on me and warns me about an evil stirring in Britannia.
 |
| Yes, I’m sure two golem brothers encompass “all that is love.” |
Third comes the Keeper of Courage, who again asks me to enter a teleporter. On the way, I happen to pass a mirror full of swirling colors. I double-click on it. A demonic face appears and calls me “master” before realizing that I’m not, in fact, his master. Recovering from his faux pas, he introduces himself as Arcadion. He says that he’s served Erethian for 200 years, and he clearly hates the mage. Erethian, meanwhile, is clearly up to something he hasn’t let on.
 |
| Give it a few minutes. |
We return to Erethian, expecting to somehow “expose” him, but he agrees freely to possessing the creature, saying that he is “sometimes useful.” Apparently, Arcadion is keen to possess the Ether Gem, which he thinks will free him, but Erethian insists that it will just confine him to a “more mobile prison.” In any event, a dragon apparently burst into the castle and stole the Ether Gem some time ago before disappearing into the Test of Courage. This accounts for the damage and debris in the rooms leading to the teleporter.
 |
| Yes, it’s too bad you don’t have a better relationship with your demon. |
We take the teleporter to the Test of Courage, which turns out to be the hardest of the tests–hard enough that I probably would have done less reloading if I’d just stayed at the Tetrahedron Generator and kept trying to defeat the guardian. The hardest part is near the beginning–a large room full of the remains of previous adventurers, in which skeletons and headless spring to life, a mage casts spells from the center, and a lich casts spells from an area to the north. Even worse, the lich is protected by some kind of ring of candles, so he can’t be engaged.
The mage has in his possession the key to the next door, so his body must be identified and looted before progressing to the next section of the dungeon. Meanwhile, flames are burning everywhere for no reason and there are two red moongates in the lower corners of the room.
Trying to get through this room with my entire party alive reminds me why people hate combat in this game. In previous entries, I suggested it wasn’t so bad, but I recant those statements. The primary problem is that you cannot keep your party in any kind of sensible formation. The moment combat begins, they go storming off in every direction. Party members with missile weapons become convinced they need more room and go tearing off in search of a better vantage. Anyone with combat settings for “hardest foe” or “easiest foe” or “random foe” will go charging after distant enemies–sometimes ones on another screen entirely. The only way you can keep people remotely together is to have everyone target the “closest” enemy, but even then, some party members have an odd idea of “closest.” Then they decide to flee when they take too much damage–sometimes–but they have no discernment while fleeing and often flee right into the path of other enemies or into patches of fire, where they enter a never-ending cycle of falling unconscious from the fire damage, slowly regenerating health (characters don’t take damage while unconscious, even if they’re sleeping in fire), waking up, taking damage, and immediately falling unconscious again.
 |
| This room has a lot happening. |
Enemies in this room seem to spawn more or less continually, so I’m trying to herd everyone through the room while still killing the mage and anyone else who’s a direct threat. The only way I can do this is to periodically exit combat, which causes everyone to rush back into formation, and then enter it again.
The issue isn’t that it’s hard to win; it’s that it’s hard to win while keeping everyone alive. The more characters you have, the stronger your party is collectively, but the greater chance that someone doesn’t survive a tough combat. Not for the first time, I wonder why ORIGIN allowed you to select individual party members in Ultima VI but not VII. With that option, I could hustle some characters across the room while others fight. I could leave most of them around the corner and send one character forth to lure enemies one-by-one. Instead, I’m reduced to a lot of reloading. I can’t tell you how sick I am of hearing the Guardian say, “Poor Avatar. Poor, poor Avatar” before waking up in Paws.
 |
| At least there’s some good equipment in the room. |
All of this complaining should be tempered, of course, by the knowledge that I’m in Forge of Virtue a bit earlier than the game probably intended, so the particular difficulty of this dungeon is by design. Eventually, I do get everyone through the room, picking up a lot of valuable magic armor from the corpses on the way. We unlock the door and continue down the corridors.
The rest of the dungeon has a few switch puzzles, giant spiders, giant scorpions, and other creatures before we reach the end. There are a couple of puzzles in which you have to sacrifice magic gear (although you find the gear in the same dungeon, so it’s really a draw).
There’s a room with a couple of dragons before the final room with the dragon. I think I’m being clever by using a Potion of Sleeping and a vial of sleeping powder on the dragons, knocking them out long enough for my party to administer a couple of coups de grâce and then looting their corpses for gems. Then I encounter a locked door that requires the same key used on the first door, which I left behind. By the time I return, the dragons have respawned and I have to defeat them “for real” this time.
 |
| I thought I was so clever. |
In the final room, we meet the dragon Dracothraxus, who indicates that he’s the final test of courage. We’re plainly meant to defeat him with a glass sword found on a charred body within the chamber, but I don’t find it until after we’ve won with regular weapons. This only takes one try, which surprises me given how hard the first room was.
 |
| The true Test of Courage. |
For our victory, Dracothraxus gives us the Ether Gem and says that we won’t have passed the Test of Courage until we defeat him for good, which will require an artifact that doesn’t exist. This doesn’t make a lot of sense given that Dracothraxus forced his way into the test, but whatever. We have to walk back through the dungeon–fighting the dragons a third time–to return to the castle.
Back in the fortress, Erethian tells us that the artifact of power we’re looking for is probably a giant blackrock sword, which he once attempted to make but lacked the strength to properly forge it. He waves his hands and magically summons a blacksmith’s workshop in the entry hall of the castle, including a well and bucket, a trough, a hearth full of coal, a hammer, an anvil; a bellows, and the sword blank he’d previously attempted. It’s not that I don’t appreciate the help, but this part seems far too easy. I think I might have preferred if I’d had to take the sword back to the mainland, find a forge, and figure it out for myself.
 |
| Erethian, acting as the deus ex caminus. |
There’s a lot of trial and error in the ensuing process. The winning sequence goes: Fill the bucket a few times at the well and dump it into the trough; put the sword blank across the hearth; pump the bellows until the sword is glowing bright; put the sword on the anvil; beat it with the hammer; repeat the process until the game tells you you’ve done as much as you can; heat up the sword one last time; douse the sword in the trough. For a game that allows you to do so much with the environment it is unnecessarily finicky with the controls during this process. You can’t manually pick up the sword and move it to the anvil; you have to double-click on it and then click on the anvil. You can’t equip the hammer and then attack the sword as in combat; you have to double-click the hammer and then click on the sword. And the first few times you heat it up and pound at it on the anvil, there’s no encouragement that you’re doing the right thing.
 |
| The Avatar hammers the blackrock sword. |
When it’s all done, the game tells us that the sword is too heavy to wield, so back we go to Erethian for advice. He suggests binding Arcadion to the Ether Gem and then binding that to the sword. This is supposed to be as easy as holding the gem in my hand and smashing the mirror, but here I run into significant problems. It turns out the Ether Gem is about the size of a marble, nearly impossible to find in my backpack, and at the same time I never really looked at the gem that Lord British gave us. I confuse that gem for the Ether Gem and keep trying to use it, which keeps causing it to shatter. It takes loads of time and a YouTube video to figure out what I’m doing wrong. Afterwards, I do it right–but what the heck is the purpose of the gem Lord British gave us?
 |
| Denial to acceptance in a few words. |
Arcadion is at first delighted to be freed from the mirror. He then swiftly goes through the five stages of grief as he realizes he’s trapped in a gem. In the resulting conversation, I order him to bind with the sword, which then becomes usable as a weapon. I can talk to Arcadion at any time by double-clicking on the sword in my inventory. It allows me to call up on special abilities titled “magic,” “death,” “fire,” and “return,” all of which I need to experiment with more.
We return to the Trial of Courage, fight our way through the monsters a second time, and confront Dracothraxus again. He and Arcadion have some dialogue indicating that they’re old enemies as the battle commences. I defeat the dragon without much trouble and he departs, giving us access to a northern room with the Talisman of Courage.
 |
| A little smack talk before the rumble. |
We are teleported back to the room with the three statues, where the Avatar’s strength is raised to 30. The Keeper of Courage then demands that the Avatar seek the Talisman of Infinity.
Erethian again fills us in: If we focus the convex and concave lenses on the combined Talismans of Truth, Love, and Courage, it will call the Talisman of Infinity from the void. “Once here,” he says, “it would seem that its sole purpose is to coerce a powerful force into the void.” He suddenly realizes what that “powerful force” might be and shuts down, but Arcadion pipes up and fills us in on how to perform the rest of the ritual.
 |
| The persistence of NAME and JOB when talking to a sword belie the Avatar’s newly-increased intelligence. |
We have to take the Golden Ankh to Britain to grab the two lenses from the museum, then head back to the Isle of Fire.
 |
| These don’t really belong in a museum anyway. |
Back in the fortress, we arrange the Talismans as instructed on top of the Dark Core. (Until this point, I didn’t even realize it was the Dark Core. I thought it was just a pedestal.) The Talisman of Infinity appears long enough to snatch the Core into the abyss. Erethian teleports in, enraged, and tries to cast VAS ORT REL TYM, which means something like “through great magic, change time,” but his spell backfires and reduces him to some bones scattered across the floor.
 |
| The Talisman does its job while the bones of Erethian litter the floor above it. |
We sail back to Vesper, board the carpet, travel to Britain, wake up Lord British, and tell him the news. As a reward, he doubles my strength to 60. And thus the Forge of Virtue ends.
 |
| What if Exodus had returned and the Guardian invaded at the same time? That would have been interesting. |
I have to say, as much as I’ve enjoyed Ultima VII so far, there wasn’t much that I liked about the expansion. The backstory started out promising, but then the game started playing me instead of vice versa. There was too much exposition from Erethian, his instructions were too explicit, and the resolution of his story was unsatisfying. I had hoped that it would turn out that he was Exodus–or at least his psyche–trying to figure out how to reunite with his “Dark Core.” Something needed to explain the mage’s familiarity with Mondain and Minax and other mysteries in his backstory.
 |
| If Lord British is going to keep to one side of his king-sized bed, I don’t see why I shouldn’t crawl in next to him. |
Finally, while it’s nice to leave an expansion with some improved stats and gear, this one goes way too far. The Avatar’s dexterity, intelligence, magic, and combat all doubled, and his strength quadrupled. There’s no point in any further training or development for the Avatar, except for leveling so he can cast higher-level spells. And honestly, if you have a weapon this powerful, is it really necessary to make it capable of a “Death” spell, too?
 |
| My character at the end of the session. |
But of course I knew most of these things going in, so I can’t complain too much. The trip serves its purpose. After our visit to Britain–where we return the two lenses, as well as cash in our accumulated gems and gold nuggets–we return to the Dungeon Deceit and the Tetrahedron Generator. The Avatar goes in and its guardian dies in a couple of hits from the sword. The Generator is destroyed.
 |
| You’ll have to take my word for it. I would trade every spell that sword is capable of casting for a permanent “Light” spell. |
We cap this expedition with a return to Moonglow. Mariah is her old self, no longer confused or insane, although her character graphic still suggests she hasn’t slept, bathed, changed, or combed her hair in a while. She thanks me for restoring magic, as does Penumbra.
 |
| The way you know is that no one else ever solves any problems in Britannia. |
I think it’s finally time to move on to Jhelom and Dupre, and to test out our new sword in the Dungeon Destard.
Time so far: 40 hours
Original URL: http://crpgaddict.blogspot.com/2020/06/the-black-gate-la-forge.html