From The Adventure Gamer
Written by Alfred n the Fettuc
Last time we left our friends WEEN, PETROY and the two stupid twins, we were on a beach near Volcano Island which seemed like the final step of our journey. For memory serves, the twins had been robbed of the haversack containing our inventory by “a gigantic monster with fangs”. Turns out the gigantic monster is here and it looks suspiciously like a peaceful owl. Talking to it gives you the classic “mafia talk” : I found your abandoned haversack, and I can give it to you in exchange for some valuables.
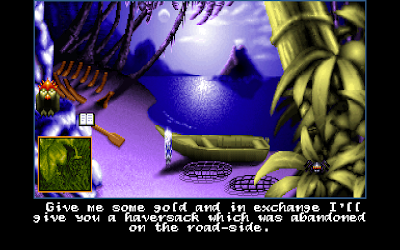 |
| You should be more careful with your stuff, so many people can’t be trusted… |
The twins admit that this was the monster that stole the haversack but it “has grown thin”. Tchh. Stupid twins.
 |
| Interestingly enough, the twins look up when talking to WEEN. The mystery of their actual size continues… |
Finding some gold seems straightforward enough. I pick the strawberries on the bush and find the flute left in the sand. Calling URM and giving him the strawberries, “produces” (we’ll use the term produce now, it seems less risky) some gold and I can give the ransom to the owl. The owl doesn’t “return” the haversack as much as “transform into it”. Let’s not look too much into this as this is quite common in this weird world.
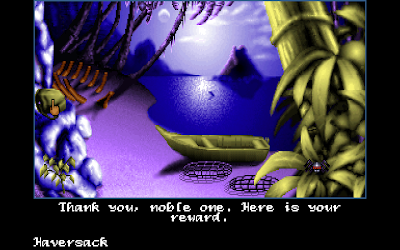 |
| You mean the owl was the haversack from the start? That’s what I call a twist. |
My precious stuff back, I explore the rest of the area. I pick up a net on the boat as well as an oar next to it. Trying to use the boat tells me that there is no mast, no floats nor rudder. Talking to the big spider on the right tells me it can make me a magic sail but it wants fish eggs for it.
 |
| This neighbourhood is full of animal bullies. |
The ship carcass on the upper left of the screen is interesting but I can’t seem to do anything with it just by clicking on it. Shaking the coconut tree next to it gives me a lot of coconuts though. Putting them into the lobster cages next to the boat produces two perfect floats. I throw my net in the sea and catch a fish that I can cut open with my sword to get some fish eggs (eeeek). The spider gives me a magic sail in exchange and takes off. I can use my sword to cut the bamboo pole on the upper right corner of the screen and use that as a mast. With my newly found sail, this boat starts to look like something that might work!
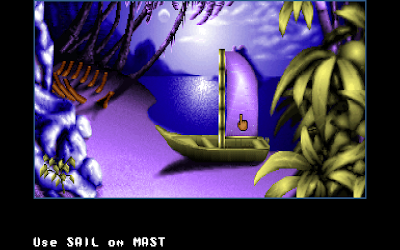 |
| Mc Givween strikes again. |
Trying to use the oar as a rudder takes me a little bit of time because you have to specifically select the “notch” at the end of the boat and not the boat itself, but it eventually works. Now I just need some way of cutting into the ship carcass so I can get an arch for my floats. The sword doesn’t work but the hammer does! I put the arch on my own boat and attach the lobster cages and voila!
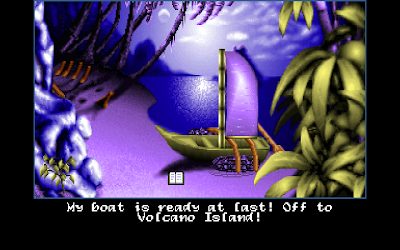 |
| Bamboo pole and coconuts. Now that’s some eco-conscious boat! |
Crossing to Volcano Island apparently takes two days and we’re getting close to it on the very day of the eclipse! While we’re getting ready to arrive, though, KRAAL’S minions strike again, and a swordfish pierces my boat! The boat starts to fill itself (with a worrisome real-time factor by the way) and I have to find a way to plug the leak.
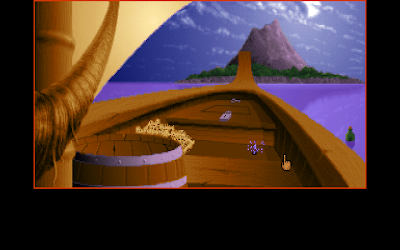 |
| This kinda remind me of LSL 2… Anyone has a spinach dip I could use? |
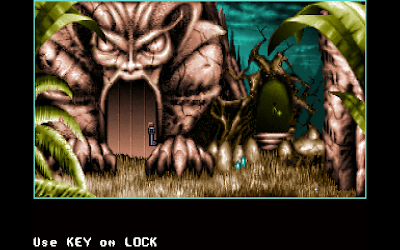
So, the boat is gradually filling with water. I quickly find that I can empty it with the cauldron however. Just to see what would happen, I let the boat fill itself, but when it’s full, it stops rising and you’re just pulled into a close-up of the water. You then have to find the cauldron trick in order to come back to the full view and do something else. Despite the obviousness of this, the key doesn’t open the padlock. I can’t reach the bottle in the water with only my hands, but turning the cauldron into the pipe allows me to get it and get the cork. Inside the bottle, another note saying “Azeulisse loves Djel”. Another throwback to the Legend of Djel. With the key useless, I use my trusty hammer to destroy the padlock. In the hold I find some tar. Now is time to fix the boat! First clearing the remaining water, I have to act fast. Just putting the cork in the hole doesn’t work. I dip the cork in the tar and put it in the hole. Another strike with the hammer finishes the job and plug the leak (while destroying my precious tool in the process)! Nice puzzle by the way, with a touch or real time stress factor… Now we’re back on track and arrive to the shores of Volcano Island!
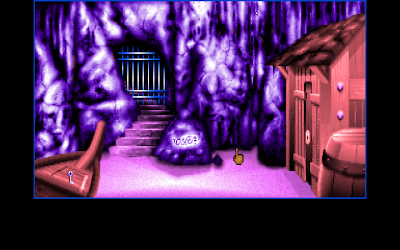 |
| The famous PURPLE shores of Volcano Island. |
The engraving on the rock shows once again “Djel and Azeulisse forever” which lets me think that they already passed through here (and also that their need for recognition might reveal the fact that their relationship was not as strong as it looks if they need to show the world their love every occasion they find, but maybe I’m not a romantic). The key from the boat opens the shack and I meet a one-eyed man in robes that asks for help.
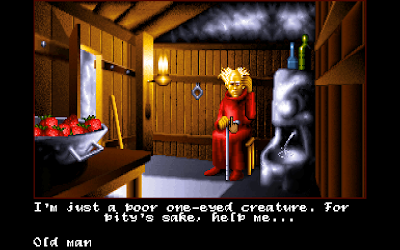 |
| What are you complaining about, old man? You have strawberries, what else would you need? |
He tells me the ring will open the gate but he requires alms before allowing me to touch it. I give him the coin I’ve been lugging around for some time now but he tells me it’s not enough. I grab the shovel he has in the corner of his shack and call URM for some strawberries banquet. In exchange for it, URM gives me some more gold that I give to the man. He still asks for more.
 |
| A bit greedy ain’t we? |
I exit the shack and start digging around in the sand with the shovel. I find a lot of hotspots and dig for a while. I find a diamond, some jewels, a sandal, and a parchment reading “I’m yours forever, Djel”. WEEN then expresses the exact same feeling I’m starting to have.
 |
| My thoughts exactly. |
I keep digging and find an oyster (which I open with my sword to recover a pearl, as contained as exactly every oyster in every video game/film/book ever made). I also find some fish bones, a gold bar and an eye (which I hope is a glass eye but the game ain’t very clear on this). My shovel breaks down, which tells me I’ve found all the hotspots on the beach. I come back in the shack to give all my loot to the poor beggar.
 |
| Glass eye. Glass eye. Thank God. |
He uses the fish bone as a comb and is very happy to retrieve his sandal. I give him as well the gold ingot, the jewel, the pearl, and the diamond. That’s one hungry beggar! Finally, he allows me to pull the ring to open the portcullis and disappears in a flash of magic energy. The ring opens the gate but it closes as soon as I approach it. I sense I’ve been tricked. Going back in the shack, I can use the sword to break the wall that was behind the beggar. At least I can go in, even if I’ve been exploited by this dirty lying wizard, I’m making some progress.
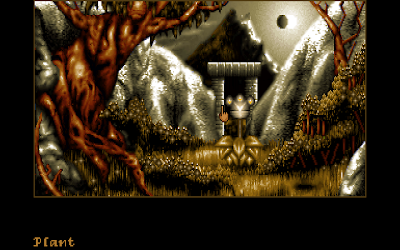 |
| Nice garden you have behind your shack, old wizard. |
A giant carnivorous plant stand guard in front of the only obvious exit and tells me that KRAAL has given it the power to rule this forest by imprisoning the nature fairy. So I guess every being can become megalomaniac if given the chance, including a daisy.
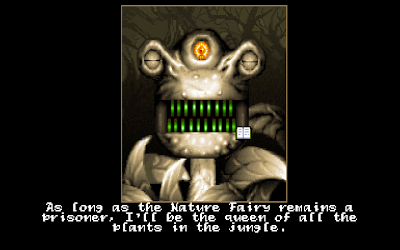 |
| Nothing a mixture of flower, venom and elixir can’t deal with, I’m sure. |
My first instinct is to use my sword on the plant but with every blow, she grows another head. I’m sensing that it’s not really the best way to go.
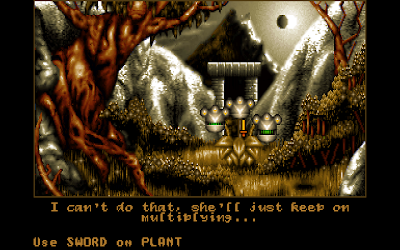 |
| Or I can do that a few more times and maybe the weight of the heads will make it topple. |
Clicking on the holes in the ground makes another Orivor appear. URM nicely reminds me that it can help me if I give it gold, but thanks to the beggar, I’m completely broke. Time to find some more strawberries I suppose. Using my sword on the branch on the left gives me a bow-looking piece of wood, and using it on the branches on the right gives me some bare arrows. There is a walnut in the tree that’s supposed to contain the Nature Fairy according to the plant but I can’t reach it. Considering the puzzle with the Orivor looks like the last one on the bridge over the lake, I plug one of the holes with my cauldron and click on the other hole. Sure enough, to escape me, the Orivor digs another hole and reveals a pendulum.
I guess that I’ll need the pendulum to search the screen and discover something hidden, I realise something : What I thought was lazy puzzle design (reusing the same solutions for the same puzzles, like the cauldron to plug a hole) is in fact a way of teaching you how to react in front of different versions of the same puzzle. The digitalis for the rat in the very beginning, for example, gives you a clue needed to defeat the ant queen with a variant of the same puzzle. This is not on par with The Witness or anything like that for example where this philosophy of game design is the whole idea (you could theoretically finish The Witness very quickly if you know what every symbol is for) but it can be considered the basic premise of this idea. If I hadn’t been stuck with the dowsing rod earlier, I wouldn’t think of searching the place with the pendulum. That’s actually pretty good puzzle design in my book. I’m not saying it’s the first game to do that of course. Every adventure game that reuses some variant of a puzzle in one way or another can be considered teaching you, and I think it’s inherent to the genre, but it’s a pretty nice thing when done right.
But enough rambling for now, we have a plant to kill.
 |
| Crikey! |
Sure enough, using the sword on where the pendulum’s swinging, I discover a bar of gold in a bush. I give it to the Orivor and it gives me a rope in exchange (geez, gold has a real low exchange value in this universe). I use it to make a bow and fire an arrow at the plant… who eats the arrow and doesn’t care. Trying to aim at the walnut, I miss it and disturbs the red bird from before who… gets eaten by the plant in an explosion of feathers…
 |
| Sorry buddy… |
I figure the feathers will be used to stabilize the arrows in order to be able to hit the walnut (as opposed to trying again and again which is the way we’d be doing if we were trapped in real life on a volcano island facing a man-eating plant and trying to hit a walnut with an arrow to release the Nature Fairy. At least, that’s what I did when it last happened to me), but I can’t get to the feathers without having the plant snap at me. I spend waaaay too much time figuring out how to get the feathers. Needless to say I tried firing arrows all around the screen and use the pendulum wherever I could, but I just needed to turn the sword into a pipe and use it to get the feathers. Don’t know why it didn’t occur to me earlier considering I’m using this bloody pipe half the time to grab things from afar. I’m guessing I’m not learning as fast as the game supposes me to.
 |
| The plant obviously mocking me is not helpful. |
I use one of my more-accurate arrow to hit the walnut. I now have to turn back the pipe into the ball then turn the ball into the sword (grrrr) in order to open said walnut and release the Nature Fairy.
 |
| The fact that she looks like Sadako from the Ring movies isn’t frightening at all. |
The Nature Fairy then proceeds to kick the plant’s metaphorical butt by turning it back into a daisy and let me into the cave behind it. Thanks, scary little fairy girl!
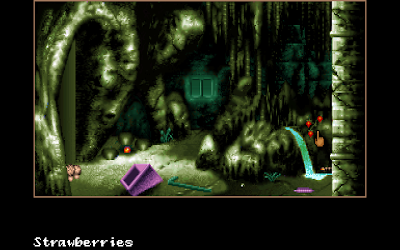 |
| Another day, another strawberry. |
I start this new cave by grabbing the strawberries and calling URM. He gives me some gold (in the form of an ingot this time, maybe he has tummy issues with all the strawberries he’s eating). I get a feather from the ground and use it on the apparently empty chest in order to make two vials appear, venom and pollen as predicted. I also spot a worm and some mushrooms, but this worm seems to have an indigestion and doesn’t want to eat the mushrooms. Using the cauldron to get some spring water and trying to make the mushrooms grow doesn’t work either. There is also a cane and a glass eye on the ground. Using the former on the latter makes the thief from before appear.
 |
| No problem, he seems trustworthy, this time… |
Giving him the gold simply makes him disappear, laughing at my naivete. I have to find a way to make him keep to his word. I call him back by using the cane on the eye once again and try different things. The obvious violent options I have with my bow or my sword don’t work, but I spot some redcurrants in the lower left of the screen. Calling URM once again, I give him the redcurrants and ask him to use his magic on the old man.
 |
| Still a violent option… will do. |
The old man says he gives up and opens the door to the left. How he does that while being turned to stone is anyone’s guess, but I think we’ll keep the “it’s magic!” explanation. Going through the door leads me to another area. Before I can explore further, the twins have another great idea…
 |
| Oh come on! |
I think that by now, we can safely assume that the twins are double agents paid by KRAAL in order to slow down WEEN’s progress. Anyway, these allies have been much more annoying that any of the enemies I’ve met on my path. Now I have to find back the three grains of sand before continuing my quest. I’m guessing this will be a little more complicated than just clicking randomly on the ground trying to find them. In this new area, I see the borgol and a bird that have been turned to stone, as well as a bush hiding the mouth of a huge statue. Using the sword on it, I reveal a locked door. On the ground, I also see a silver coin that I can’t seem to take, as well as a quartz crystal. Using the pollen on it turns it into a flower of youth (which I guess was the same one as the one we used on the guardian a long time ago). I grab the pistil from the flower.
 |
| Maybe we can use it to cure the twins’ Alzheimer? |
Now that I (think) I have explored the whole place, I know I have to whip a potion of sorts in order to progress, but I spend some time figuring what. Trying to use the venom on the quartz makes a snake appear but it doesn’t seem useful. I go back in the first room in order to try other things. Remembering the discussion we had in the comments following my second gameplay post, I know that a mix of pollen and venom can make things grow. I make this potion and use it on the two patches of grass in the cavern. One is useless and one produces camomile. I guess I have to use the camomile in order to cure the worm from its indigestion but it doesn’t work as is. I can mix some water with it in the cauldron, but with no way of making it brew, it’s of no effect on the worm. After a while of trial and error, I have a facepalm worthy revelation. Maybe the spring water is not enough to make the mushrooms grow, but the potion is especially done for things like that! I use the potion once again, this time on the mushrooms and tadaa! The mushrooms get huge!
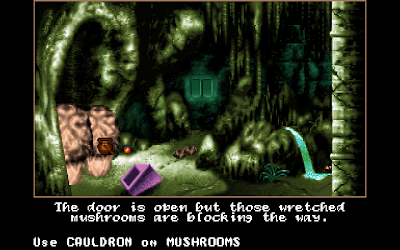 |
| Blocking the door in the process, but one step at a time… |
While growing, the mushrooms have produced two truffles that I get. This might just be another ingredient for my potions workout. Sure enough, mixing the truffle and the pollen gives the Vitalys potion. According to PETROY, it gives life back to people turned to stone. Score! I know what to do with the two statues outside. Now, I just need to cure the worm for it to eat the mushrooms. Trying to use the Vitalys potion on the worm prompts me a close-up of him calling me a murderer, so I guess this potion is not to be used on the things that are not turned to stone.
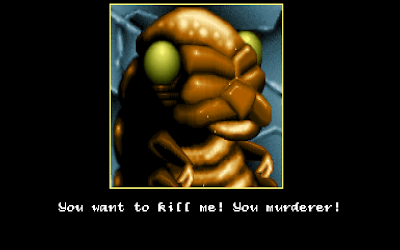 |
| Come on, little buddy, I’m sure it’s perfectly safe, like the digitalis. |
Mixing the truffle with the venom, I find another recipe in the form of the Luciferys potion (cool name!). PETROY tells me it’s supposed to make certain precious stones light up. I’m pretty sure the worm won’t like it so I use it on the ruby instead. The stone catches fire!
 |
| Come on, worm, your turn to try it now. |
Now that I have a hearth, I can mix a “potion” for the worm. I put water and camomile in the cauldron and put it over the fire. It works and brews some tea, which can be considered a potion of sorts (especially in the UK). I give it to the worm and his indigestion is cured! That’s one potent camomile!. I put it on the mushrooms for it to clear the way.
 |
| What a cute little fella, look at all these teeth. |
With the mushrooms gone, I can now go back to the garden in order to try my new Vitalys potion on the Borgol and the big bird.
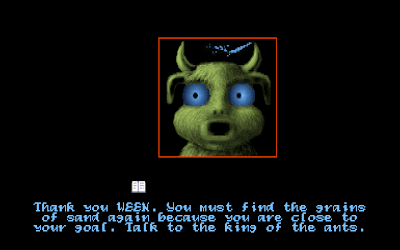 |
| Thanks a lot for your help. I didn’t guess by myself at all that I needed to find the grains of sand again. |
Using the potion on the big bird makes it fly away, freeing a lever that was hidden behind him. I pull it but nothing seems to happen. I guess it’s connected to the cave somehow, but before checking that, I spot a big ant that has appeared on a leaf in the upper right of the screen. Considering the Borgol told me about the king of the ants, I speak to it. The ant asks me to bring it a pistil of youth because “his people have become senile since KRAAL’s arrival”. Maybe it means that UKI and ORBI are secretly senile ants? The plot thickens. Anyway, I give it the pistil and, to thank me, it turns me into an ant so I can look for what I’ve lost. Yay!
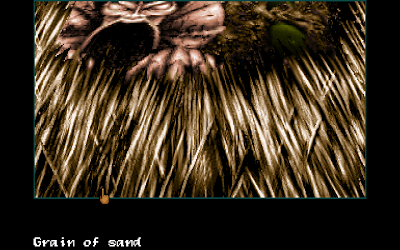 |
| Pixel hunting galore. |
I find an axle in the herbs that was hiding a grain of sand and then I spend a lot more time locating the two others. At first I thought I was supposed to use an item or another (the sword to cut some grass for example), but it turns out I just needed to pixel hunt the grains of sand (yes, finding greyish grains of sand hidden in greyish leaves is so fun). Now that I know where they are, they obviously appear on the screenshot but it took me quite some time and thoroughness in my mouse swipes to find them. After picking up the three grains of sand, my normal size is restored and I’m free to get back to the main course of my adventure (until the twins’ next bright idea that is).
Going back to the cave, I discover that the lever has indeed modified something there. What was before a nondescript alcove in the back of the cave has now revealed a mechanism of sorts. I can use the axle I found in the grass to fix it and then pull another lever that gives me… a key! Yay! Going back in the garden, I open the door, hopefully to gain finally access to KRAAL’s lair! Aaaand… not yet.
 |
| The old trick of the double door… |
Yes, behind the door is a silver grill that blocks my path once again. Silver? There is this silver coin that’s been bothering me for a while in the lower right corner of the garden. Maybe this is related. I’m guessing I need some potion once again. Maybe something to melt silver? Once again, it takes me a while to find what seems obvious in retrospect. I never tried putting three ingredients in the cauldron. In my defence, the whole potion mixing aspect is a bit tedious. Everytime you try to mix things, you lose the potion made if you use it on something you’re not supposed to do. If you want to try the Vitalys potion on everything on the screen, you have to mix it every time. It sure goes a long way to avoid relying too much on trial and error, but it looks a bit like the process of changing the copper ball on something else : the whole game might have gained from a refined way of going from one potion to an empty cauldron and vice-versa. Then again, I’m rambling a bit, but once you realise the base of a potion is always pollen or venom, it simplifies all the process a lot. So I mix pollen, venom and truffle in my cauldron, and end up with a potion aptly-named Change. Using it on the silver coin turns it into a worm. I brew some more and use it on the silver grill.
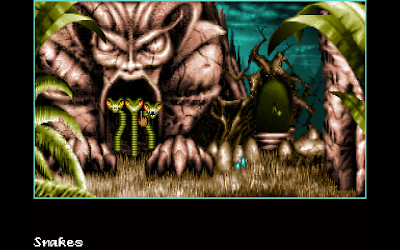 |
| Snakes. Why did it have to be snakes? |
Dropping some venom on the newly-formed snakes turn them into a wall of rubies. I brew some Luciferys potion and it turns them into a wall of flames. I then go back to the cavern, fill my cauldron with water and splash it on the flames. Tadaaa! The door is finally opened!
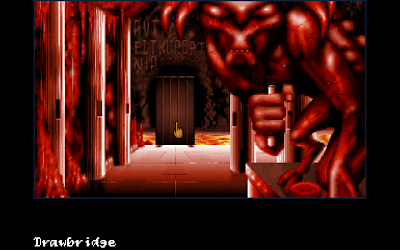 |
| Is it me or are the statues around here becoming more and more ominous? |
And this is where we stop for now. We’re definitely getting close to KRAAL but we’re not there yet and the game is becoming more and more difficult, which is a good thing compared to the cakewalk it was in the beginning. Despite all the rambling about how more streamlined all of this could be, I’m really enjoying myself here. Join me next time as we (hopefully) finally put an end to KRAAL’s reign of terror!
Session time : 3 hour 30 minutes
Total time : 7 hours
Inventory : Copper ball, ring, tiara, necklace, bow, truffle, flute, pollen, venom, 3 grains of sand
Companions : PETROY, URM (I don’t consider UKI and ORBI as companions anymore, they are dead to me)
Original URL: https://advgamer.blogspot.com/2019/12/ween-prophecy-alchemy-and-redcurrants.html

